viernes, 20 de diciembre de 2013

Mini Vegetarian (or vegan) Tamales!

If you're brave enough to attempt these and can get a hold of corn flour, you'll have some very happy eating. I wouldn't exactly say that making tamales is one of our family traditions, but eating them sure is. Making tamales takes me back to a time when we all chipped in while one of my great grandmas was still alive. To make my house smell like it did that night is more than worth the time and effort. Cooking is filled with emotions for me.

You can pretty much fill the tamales with anything you want really. I used kimchi and a bit of cheese. Sounds odd, but they were fuckin fantastic in my opinion. Omit cheese to make the filling vegan. Because I can't get corn husks here, I used coffee filters. Apparently you can use that or soaked parchment paper, thanks be to the internets. I also don't have a proper tamale steamer, so I improvised. When it comes to the amount of corn flour, I tried my best to guess, but it might not be exact. Basically, you want the masa(dough) to be smooth enough to spread, but not too creamy. You also don't want it too hard, because then you'll have thick tough balls of cooked dough for tamales. It should be close to the consistency of a batch of mashed potatoes before adding milk and butter to make them creamy, that's the closest thing I can think it looks/feels like. Touch your food, with clean hands of course. I eyeball almost all of my cooking, so I'm just making the disclaimer if you used the amounts I have here and they didn't come out to your liking. Always try again, I've learned through many mistakes over and over, it's okay.

A final note on corn flour. If you can, actively seek out non-GMO corn flour. I won't go into details too much, but basically, what they have done to corn in the modern age is absolute shit. I'll let you do the research and make your own decisions. I ordered my corn flour online, and was able to find non-GMO from www.fbcusa.com which is a handy site if you live in Japan, try iherb.com if living in the U.S. Let's get to tamales:


Utensils needed:

One big ass pot
A vegetable steamer
A wire whisk (not that plastic shit)
Large mixing bowl
CLEAN small towel or large rag
Coffee filters, or parchment paper that has been soaked in water. I used these coffee filters:


Makes about 10 to 12 very small (about finger length) tamales depending on how big your coffee filters are

Ingredients:

Vegetable shortening, 120g tube
Corn flour, about 1 cup I think
Baking powder, about 1/2 teaspoon
Salt, a few pinches
Any spices you'd like or dried herbs, like pepper, oregano, cilantro, etc. A small pinch of each
Warm to hot water, about 1/2 cup
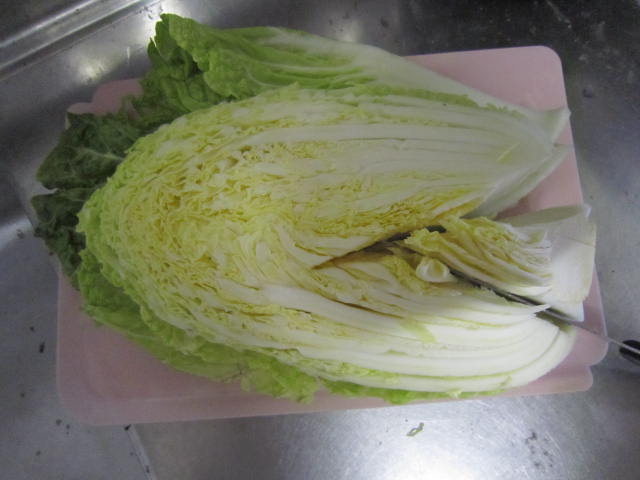
Filling for tamales. I used kimchi and cheese. About half a cups worth. Raisins and nuts or fruit like pineapple if making sweet tamales.

Make sure you have all the right utensils for making the tamales before starting your mixing.

First, use a sharp knife to literally cut open the tube of shortening, because who the hell puts shortening in a tube (oh Japan...)? Squeeze all the shortening out into the large mixing bowl. Now the labor part.

Using the wire whisk, mix the shortening to make it fluffy. Pretend you are lifting an egg white. It's the same motion, but since the shortening is very thick, it requires a ton more muscle and work. Once the shortening is fluffy and smooth, basically when you're out of breath and your arm hurts, it is ready. Remember to take breathing breaks in between. This fluffiness takes me anywhere from 10 to 15 minutes, and it's not really a step that can be skipped, sorry.

In another medium bowl, add the corn flour, the baking powder, the salt, and any spices. If you are making sweet tamales, add a bit of sugar and instead of oregano and cilantro etc, use cinnamon, nutmeg, ground cloves, etc. Mix well with a fork to incorporate everything.

Add about half of the corn flour mixture and a few tablespoons of the hot water into the bowl with the fluffed shortening. Use a medium spoon to mix the dough, folding everything together. Once mixed well, add more corn flour and hot water, and mix again. Do this until the masa (dough) is mixed well, and the texture is sort of similar to a less creamy version of mashed potatoes. You may have to use your hands, that's okay.

**Feel free to do some internet research on the "right" consistency of tamal masa. You will be overwhelmed with what everyone thinks is "right," but it also depends a whole lot on your corn flour and personal preference, so experiment. P.S. fuck GMO cornflour! If you're in the U.S., that's pretty much all you'll find in the stores. Very sad teary reality. You might be able to find non-GMO corn flour in health food stores and such, that's your best bet. If not, online. Try other varieties of non-GMO cornflour too. Corn in nature has such rich diversity and colors/flavors, but unfortunately that is being destroyed at an alarming rate. Okay, back to the recipe.

Prepare the pot and vegetable steamer. Add about 2 to 4 cups of water to the pot. There should be enough water to cover the bottom of the pot so all the water doesn't evaporate during steaming, but not enough water to boil up onto the vegetable steamer (which would wet the tamales, a no no). Turn the heat on to medium and cover the pot

You're ready to spread. Cut the coffee filter if needed as such:


Place about 2 tablespoons of the masa into the center using a medium spoon. Spread the masa evenly out from the center. Add about a teaspoon and a half of the filling to the middle. Press both sides of the coffee filter so the masa touches and wraps up the filling. You can use your fingers to help make sure the filling is sealed into the masa well, like you would a dumpling. Wrap the coffee filter around the tamal to seal it in well and place on the vegetable steamer in the pot.

These are the finished product wrapped in the coffee filter, but basically, you want to wrap the tamales as such:


Continue to place wrapped uncooked tamales on the steamer in the big pot until you run out of masa. Place them evenly around the steamer to make sure the steam will get to all of them evenly.

Place a clean towel or rag over the tamales as such, making sure it doesn't touch the sides of the pan:


**If you are lucky enough to have a very deep pot, you can make more tamales. Basically, stack a layer of tamales on top of the rag/towel, place another towel/rag on top of that layer and keep stacking. Make sure you cover the last layer with a rag/towel though. If making more, obviously, double or triple etc. the ingredients used.

Once the water comes to a boil you have 2 options: Option 1) You can leave it on medium heat. This will cook the tamales within about 40 minutes or so, but you run the risk of the tamales coming out drier because it is harder to control the heat.

Option 2) lower the heat to medium low, it'll take the tamales about 1 and a half hours to cook, but they are more likely to come out moist (not wet) and smoother. Cover the pot for both options.

The tamales are ready when they are cooked through. When you press on it, it should no longer be mushy and spring back. Yet, they should not be hard like a dense cake or bread either, that means they are overdone. You may have to make a few batches to learn how to know when tamales are ready. I wish I could put into words the smell of a tamal that is ready, but that's just something you'll have to figure out.

Notes: Don't be scared of making tamales. They can be a very fun, albeit labor-intensive, process. Getting friends and family involved is also awesome. Plus, if you are able to make these in Japan, you can wow the hell out of your coworkers/everyone, it's not everyday someone makes a traditional Mexican food like tamales in Japan (if ever). Also, mistakes happen. I've made many many batches throughout the years, and have finally learned what it is I like and how to make tamales I can call my own. You learn by fucking up, but it's worth it. Finally, try all sorts of fillings. Chile and cheese, mole, beans, fruits, endless possibilities. Happy cooking!

viernes, 22 de noviembre de 2013

Damn Good Chile!

One thing you'll likely not find much of in my cooking is speed. I'm not a huge fan of "quick and easy" recipes. Not that I'm against them or anything, I just prefer my food to cook on super low heat for hours to let flavors mesh better, and even to let it sit for a day sometimes. This is one of those recipes :) I'd been really wanting something hearty as the cold weather starts to come, and I seem to have done it with this chile. I would have preferred to put in fresh non-sweet white corn instead of the edamame, but the edamame came out quite nice. If you can't find/have the dried chiles (which you likely won't if you live in Japan), you can just use about a tablespoon of red chile powder, that should be fine. I added the onions and bell peppers last so that they could still be a bit crunchy when served, but you can add them in with the carrots if you like. Finally, all the amounts are guesstimates, so feel free to not use measuring anything ha ha. Hope this helps keep you warm this winter.


Cook Time: 2 to 3 hours, plus overnight soak for beans

Makes about 8 to 10 servings

Ingredients:

Dry beans, large type like lima, kidney, etc., whatever your store stocks. About 3 cups dry
Dried small chile pepper, deseeded
5 smoked chipotle peppers, deseeded
1 dried chile rojo, deseeded
2 chile de arbol, deseeded
Garlic, 5 to 7 cloves, chopped up into small pieces
Very ripe tomatoes, 2 medium, diced up into small chunks
Red wine, cheap kind is okay, about 1/4 to 1/3 cup
Olive oil, 4 tablespoons
Mirin (sweet fermented rice wine), 1 tablespoon
Soy sauce, 1 & 1/2 tablespoons
Shiitake mushrooms (or similar type), 15 small, stems removed and cut in half
3 medium carrots, diced into medium chunks
Edamame, removed from pods and rinsed, about 1 cup's worth
Onion, 1 medium, diced up
Bell peppers, 10 small, diced up

Spices, to be added in all at once:

Bay leaves, 4
Dried oregano, 1 teaspoon
Dried parsley, 1 teaspoon
Dried basil, 1 teaspoon
Black pepper, 1 teaspoon
White pepper, 1/2 teaspoon
Ground cumin, 1 teaspoon
Cinnamon, 1/2 teaspoon
Nutmeg, 1/2 teaspoon
Paprika, 1 and 1/2 teaspoons
Salt, 1 teaspoon

Soak the beans overnight or for at least 8 hours. I suppose you could use canned beans, but I don't like doing this as you can't control the flavor of what comes in a can, plus it's just not as fresh

The next day, rinse the beans and place in a large pot. Pour enough water to just barely cover the beans. Turn the heat on to medium high. Once the water begins to boil, lower the heat to the lowest setting possible.

Add the small pepper, the chipotle, the chile rojo, and the chile de arbol to the side of the pot. Cover the pot and let cook for about 3 minutes.

Remove the dried chiles with a fork or chopsticks and put in a blender. Use a ladle to scoop out some of the bean water and add to the blender. Blend this until there are no more big chile chunks in the mix. Add this back to the pot of beans, pouring more bean water into the blender and shaking it around to make sure you get all the mix from the blender out.

Add the tomatoes, red wine, olive oil, mirin, soy sauce, and all the spices. Stir well.

Add more water to the pot to cover everything. Don't add too much water though, a few cups should be alright. Let this come to a boil, lower the heat, then cook on a low flame for 1 hour to 1 and a half hours.

**Note: Check that the beans are cooking well, they should be soft after about 1 to 1 and a half hours, even if not completely cooked quite yet. Basically, if you take one out and it is too hard to chew, they are not ready. If this is the case, let this pot boil on low heat for another 20 minutes or so, then proceed with the next steps.

Add the shiitake, carrots, and edamame. Stir well.

Let the chile cook for another 30 to 40 minutes, then add the onions and bell peppers and stir well. Cook for another 15 to 20 minutes to let all the flavors soak in well.

Enjoy with whatever the hell you want; like crakers, bread, rice, whatever you fancy. Happy eats :)

martes, 19 de noviembre de 2013

Potato Tofu Saag (and Roti)

When Japan gives you spinach, make saag! This version is vegan too, and comes from looking at a couple recipes online and coming up with my own processes and ingredients. Amazing what a little creativity can do. However, if you do prefer the dairy in your saag, substitute the coconut milk with whole whipping cream or unflavored yogurt, and the tofu for paneer (the cheese). If you don't have spinach, feel free to use whatever sort of dark leafy green you have available. Also, if you want to make this less spicy, omit the ingredients I've labeled as optional. Feel free to play around with spices and quantities to find something you like. This recipe and eating this yummyness helped me get over a stupid cold I had for a bit. Nothing like warm fresh food to soothe the soul. I served this dish with roti. See the link at the end of this recipe for how to make the roti. Happy eats :)


Makes about 6 to 8 servings

Ingredients:

Olive oil, about 5 tablespoons
Garlic, 4 to 5 cloves, chopped up into small pieces
Ginger, chopped up into small pieces, about 1 tablespoon's worth
Onion, 1/2 of a medium onion, chopped up into small pieces
Cumin seeds, about 1 & 1/2 teaspoon
Anise seeds, about 1/2 teaspoon
Curry powder, 1 & 1/2 teaspoon
Garam masala, 2 to 3 teaspoons
Dried herbs: oregano, basil, cilantro, a few dashes of each
Black pepper, 1/2 teaspoon
Cinnamon powder, 1/2 teaspoon (optional)
Nutmeg, 1/2 teaspoon (optional)
Chile powder, 1 teaspoon (optional)
Small dried chile, seeds removed (optional)
Tomato, 1 medium, diced up
Whole leaf spinach, 2 big ass bunches. Pick off the leaves from the stems, and wash them well to remove any dirt.
Coconut milk, 1/4 cup
8 very small potatoes (or equivalent amount, like 4 medium, or 2 large), cut up into small chunks
Firm tofu, 1 block, cut up into thick cubes (to resemble the paneer in saag paneer)
Salt, 1/2 teaspoon

In an extra large pot, place the garlic, ginger, onion, cumin seeds, and the anise seeds. Pour olive oil liberally all over everything. Turn the heat to medium and let everything begin to fry. Stir frequently.

After allowing the onions to fry and get soft, add the curry powder, garam masala, dried herbs, black pepper, cinnamon powder, nutmeg, chile powder, and the small dried chile. Stir frequently with a wooden spoon while the spices and onions begin to fry. Be careful not to burn anything.

Once the pot smells nice and the spices give off a good scent, add the potatoes and continue to fry for about 2 minutes. Then add the tomatoes and cook for another 3 minutes or so, until the mixture becomes hot and begins to bubble. Turn off heat.

In another pot, place all the spinach leaves. Add about 1/4 cup of water. Turn up the heat to medium, and allow the water to get a bit hot.

Once the spinach leaves begin to wilt slightly, immediately turn off the heat. Don't throw away the water. Place the spinach leaves in a large collander, and submerge in ice water (this preserves the color apparently).

Pour the warm spinach water (which should be clean) into the pot with the potatoes, and turn the heat to medium. Cover the pot.

Meanwhile, put all the spinach leaves into a blender. Put about 1/4 cup water, and blend. Blend the spinach until there are no longer any chunks and the mixture is smooth. About 1 minute of blending should do. Set aside.

Boil the potatoes on medium heat in the large pot for a short while, about 5 minutes. Then stir in the spinach from the blender. Add the coconut milk, and stir well. Add the tofu, and stir well.

Add the salt, stir, lower the heat, and allow everything to simmer for about 15 minutes. Stir occasionally.

Serve with roti (or whatever you'd like) and enjoy!

I added some cumin seeds to the roti recipe I used below, for a nice toasty cumin flavor. I simply mixed in the seeds with the flour before adding anything else. Obviously, omit the butter at the end or use a substitute to make them vegan. Here's the video/recipe link I used to make the roti:

http://showmethecurry.com/breads/rotli-roti-indian-bread-recipe.html

P.S. This vegan version of saag should taste better the next day when all the spices have been given a chance to mesh together. And you don't have to worry about any of the dairy spoiling.

lunes, 11 de noviembre de 2013

Horchata

Horchata! Quite easy to make, but does take a while because the rice has to be left to soak for a few hours. Surprisingly, there doesn't seem to be a similar horchata-like drink in Japan (that I know of), where rice is kind of a big thing... For this recipe, I would soak one or two cups of rice at a time over a few days as I continued to pour each bit of rice water into a big jar I kept in the fridge. Takes more time, but then you don't have to plow yourself with eating so much rice all at once. Also, since I always soak my rice for a few hours anyway before I cook it, this was a great way to reuse all this wonderful rice water. My drink came out brownish because I used brown sugar, but you can use white sugar if you like for a more traditional milky color. Horchata tends to be a simple drink with rice water, sugar, and cinnamon, but I added other spices too. Feel free to omit the optional spices if you like, but I think they added a nice flavor. Hope you enjoy!


Makes approx. 2 liters, can take a few days to make.

Ingredients:

Big ass glass (or plastic) jar, to hold at least 2 or so liters. Keep in fridge.
White rice, 4 cups unwashed (you can do a cup a day)
Sugar, 3 tablespoons(you can add more later if it's not sweet enough, start with 2 if you're like me and don't fancy sugary things)
Cinnamon sticks, 2 whole
Cinnamon powder, 1 teaspoon
Clove, 1 whole (optional)
Nutmeg, 1/2 teaspoon (optional)
Star anise, 1 chunk (optional)

In a small pot, add the sugar, cinnamon sticks, and cinnamon powder. Also add the optional spices if desired. Pour about 1/4 cup water into the pot and turn up the heat to medium-high. Stir occasionally. Once mixture boils, lower the heat to medium or low and continue to simmer and stir until all the sugar has dissolved. Pour this mixture with all the spices into your big glass jar and let it sit on the counter to cool off. Once the mixture is cool[ish], place in fridge.

In the pot you usually cook your rice in (or your rice cooker pot), place a cup of uncooked white rice. Add water to cover the top of the rice, and swish around with your clean hands. DON'T throw this water away. Let the rice soak for AT LEAST 2 hours (but preferably overnight if possible).

**If you want to use all 4 cups of rice at once, by all means be my guest. Just remember to eat all your rice when you cook it later, you'll likely be sharing :)

Once the rice has soaked, pour the water and now soaked rice into a large bowl with a strainer as such:


Remove the strainer, and put the rice back into the rice cooker/pot for you to cook later (with fresh water). Now pour the milky white colored water from the bowl into the big jar with the sugary mixture. Mix well. Place back in the fridge and allow to chill.

**Using a strainer like above helps to get all that rice water out of the soaked rice, while simply pouring it out by hand lets the delicious murkiness [i.e. the good stuff] settle at the bottom and become harder to get out. So try to use any kind of strainer to get all that goodness out and into your horchata.

Continue to do this over a few days until you have 2 liters worth. Or, you could just taste the horchata each time you add more rice-water to see if you think it's ready and suits your tastes. If the contents have settled, shake the jar, or swish the horchata around with a spoon before serving. Serve well chilled, in a glass with a few ice cubes if desired.

Note: it took me a while to realize that the key to good horchata is to use murky rice soaking water (duh, I know right...), so don't expect to make 2 liters worth using only 1 cup of rice, then you'll just have sugar water.

jueves, 7 de noviembre de 2013

Shiitake (and stuff) Stuffed green chiles

Sometimes I throw a whole bunch of random shit together and it comes out amazing. This is one of those recipes. The green peppers I used are ones I found at the coop by my house, they're the medium long green ones that are used in lots of Korean cooking, and I assume they are grown in other parts of Japan too. These ingredients may sound a bit strange in combination, but trust me, they make a crazy delicious dish! This one takes some time because of roasting the chiles and dicing everything up, but it is well worth it in my opinion. Also, remember, remember, remember that these measurements are only guesstimates on my part. I have quite a keen eye, but you don't need to follow the measurements in my recipes exactly (unless I specify so, which is rare). So yeah, happy eating:


Makes about 7 well stuffed medium sized chiles

Ingredients:

7 (or so) medium long green chiles, rinsed
Onion, 1 small, diced into bits
Garlic, 4 cloves, sliced into thin shreds
Ginger, diced into bits, about 2 tablespoons worth
2 small chile peppers (the spicy kind), deseeded and diced up
Oil, for cooking (like olive oil)
Tomato, diced up into small bits, about 1/4 cup worth
Shiitake, diced into bits, about 1/2 cup worth
Leafy greens (spinach, kale, or any greens, etc.) diced up into bits, about 1/2 cup worth
Curry powder (i.e. ground turmeric, coriander, cumin), 1 to 1 1/2 teaspoons
Dried herbs, oregano, basil, parsley; sprinkle of each
Rice wine (or any white variety) Vinegar, 1 tablespoon
Soy sauce, 2 tablespoons
Mirin (みりん-fermented sweet rice wine), 1 tablespoon
Peanuts, 1/4 cup
Raisins, 1/4 cup
Shredded white cheese (optional), for topping

First, the long part. In a large non stick pan (or grill), toast the chiles. Don't use any oil, just place them on the pan and turn on the heat to medium. The skins will start to cook a bit. Let one side cook, then flip the chiles over. Let the skins char a bit on all sides. You can cover the pan to help the chiles sweat a bit as they cook. If they look like they are just gonna burn, turn down the heat, you want them to cook evenly, NOT burn. The chiles are ready when they are really soft and kind of just droop when you pick them up from the stem. Turn off the heat, remove the chiles and set aside.

In the same pan, place the onion, garlic, ginger, small diced chile peppers, and about 2 to 3 tablespoons cooking oil (I like olive oil). Turn on the heat to medium. Stir with a wooden spoon or a spatula as everything cooks. Once onions are slightly cooked, add the curry powder and the dried herbs. Continue to stir constantly so nothing burns. Cook until everything becomes fragrant, about 3 minutes or so.

Add the tomato and continue to stir occasionally. Once the tomato juices are bubbly, add the shiitake. Stir occasionally and let the shiitake soften. Then add the vinegar, soy sauce, and mirin. Stir the mixture well.

Add the leafy greens, stir, and cover. Turn the heat to very low.

While the pan is cooking all that goodness, prep your green chiles. First, if you'd like (although I did not), remove the outer skins from your chiles. The toasting you did and the letting them sit for a while should make the skins easy to peel off now.

If you're like me however, leave the skins on. It'll be a different texture, but still delicious. Now grab a chile by the stem and hold it over a cutting board. Using a small knife, start at the top of the chile near the stem and make one cut along the chile until you reach the end/bottom, i.e. cut them on one side lengthwise. The knife should slide effortlessly as the chile is soft now. A bit of juice will spill onto your cutting board. Don't throw this away!

Once you've made a cut lengthwise, carefully remove the seeds and the stem into a separate bowl or something (not on the cutting board). Everything should come off super easily as the chile is soft. Be sure not to tear the chile apart as you do this however. Place the now deseeded/destemmed chile on a plate, and continue to do this with all the chiles.

When all chiles are done, pour the chile "juice" (with no seeds) from your cutting board into the cooking pan and stir. Add the raisins and peanuts to the mixture, stir again. Let everything cook for about 1 minute and turn off the heat. Time to stuff those chiles.

Place a chile on a serving plate. Using an eating spoon, grab a scoop of the mixture and plop it into the chile. Spread evenly. Sprinkle some cheese (optional), and fold the chiles to get the mixture inside like the picture. Continue until you've stuffed all the chiles.

Now you're ready to chow down! You can serve them with rice, or place in a tortilla if you have any. I added a few slices of avocado as a topping, delish!

Note: The green chiles I used were not very spicy (unfortunately for me), so I was able to clean the seeds and pull the stems out using my hands. Use caution if you're chiles are spicy though, just a reminder.

domingo, 3 de noviembre de 2013

Curried Edamame Hummus

Hummus, so hard to come by in Japan in general, in our island in particular. Today however, we adapted a recipe found online and made our own version of delicious edamame hummus. This is our "recipe" :)


Makes about 2 cups worth of hummus

Ingredients:

Edamame, 2 bags of unshelled (or about 1 1/2 cups shelled)
Garlic, 2 cloves, cut up into chunks (will get blended anyway)
Onion, 1 small, cut up into chunks
Curry powder, 1 level teaspoon
Red chile powder, 3/4 teaspoon
Garam masala, about 1 to 2 teaspoons
Dried herbs, oregano, basil, parsley, etc.; a nice sprinkle of each
Salt, a few pinches
1 lemon
Tahini paste, i.e. ねりごま(練り胡麻) sesame paste in Japanese, about 2 to 3 tablespoons
olive oil, quite a bit

If you bought unshelled frozen edamame, place them all in a large pot with water and put on a medium flame for about 3 to 5 minutes. They don't need to be hot, just soft. Now squeeze out the beans from the inside into a collander (big strainy thing you use to rinse pasta and stuff). You'll need about 1 1/2 cups of edamame beans. Rinse them off, set aside.

In a fry pan, add a nice amount of olive oil, the garlic, and the onion. Turn up the heat to medium and cook for a bit. Once the onions and garlic cook a bit, add the curry powder, chile powder, garam masala, dried herbs, and salt. Let everything fry for a bit, but don't burn it, about 3 minutes. Turn off the heat and let it sit there.

Meanwhile, in a blender, pour about 3 tablespoons olive oil along with the juice of 1/2 of the fresh lemon (use a small strainer to avoid seeds getting in). Blend for about 20 seconds until the oil and lemon juice whip together into a nice froth.

Now add the contents of the fry pan to the blender and blend again until smooth. Now for the tricky part, making the hummus in batches.

Add about half of the edamame, the sesame paste, and about 1 or 2 tablesppons olive oil. Blend. It will be chunky.

To get it less chunky, blend for a bit, turn off, then remove the top, press everything down with a spoon, then blend again. Keep doing this. Be sure not to put too much edamame into the blender or else it'll be very difficult to blend everything.

Once this batch is smooth(ish), remove what you can with a spoon and place in a large bowl. Don't worry about getting everything out quite yet.

Now add the rest of the edamame, the rest of the lemon juice, and some more olive oil (a couple tablespoons worth). Blend like above, pressing down, reblending, etc. Once the mixture is smooth, scoop the blender contents into the bowl and mix the two (or three or four) batches until well incorporated.

To get all the hummus out of the blender, unscrew the bottom of the blender, hold the now open bottom part over the bowl. Push out all the hummus stuck to the sides of the blender down with a spoon so it all falls into the big bowl. Mix everything well. Enjoy the hell out of this tasty ass hummus! Serve with chips or whatever else suits your fancy. We spread the dip on crackers, sprinkled some black pepper, and added a dash of tabasco. Yum!

Note: The blender I used is pretty nice, hence it didn't break when trying to make hummus. I wouldn't even try making hummus in a smaller blender (like the ones they sell for making smoothies). I'm pretty sure it'll break, as I broke my friend's trying to make mole, so I can't imagine it processing hummus. If you have a food processor however, you can skip making the hummus in batches and just throw everything in all together, lucky you.

viernes, 1 de noviembre de 2013

Capirotada

Lucky you, all the ingredients for Capirotada can be found in Japan (at least on my remote island). This is a Christmas time/ New Year's kind of food, but it can be eaten anytime really. It makes a wonderful "make the night before" dessert that's pretty easy if for whatever reason you find yourself lacking ideas for a dish to a potluck or something. Instead of the french bread that's usually required, and since the store seemed to have run out of french bread, I used a big loaf of パインパン, so ingredients are also easy to substitute. For example, you can use shredded coconut instead of the cheese and make it vegan friendly.


Makes about 6 to 8 servings. Must set overnight or at least 4 hours.

Ingredients:

Oil for frying
French bread/baguette, one large loaf, sliced thinly and then cut up into medium pieces
Peanuts (or your favorite nut), 1/4 to 1/2 cup, chopped lightly
Raisins, 1/4 to 1/2 cup
Shredded white cheese (the less salty the better), 1/2 cup or so

For syrup:

Cinnamon sticks, 2
Star anise, 3 whole stars
Brown sugar, 1/2 cup (or a little less than 1/2 a cone of piloncillo if you can find it...)
Water, about 2/3 cup

In a small pot, make a syrup. Cut up the piloncillo into about 4 chunks. If no piloncillo, just pour the brown sugar into the pot. Add the cinnamon sticks and star anise. Pour about 2/3 cup water in the pot and turn up the heat to medium. Stir occasionally, and add more water if necessary. Bring to a boil.

Once the liquid is boiling, turn the heat to low. Stir on low for about 5 minutes so the syrup can get all the cinnamon and anise flavor. Make sure all the sugar is dissolved, then turn off the heat. Put aside.

In a large fry pan, add some oil and heat on medium. Once oil is hot(not burnt), add the slices of bread and fry. Fry each side for about 1 minute in hot oil until the bread pieces are rather crispy, but not burnt, adding more oil as necessary. You'll want the bread to be crispy so that it won't turn to mush when left to soak in the syrup later. Place on a plate lined with paper towels when done frying to soak up some of the excess oil.

Line the bottom of a medium baking dish with the now crispy slices of bread. Top with the peanuts and the raisins. Use a ladle to spoon the syrup evenly over the now topped slices of bread. Then top with cheese. If you have a ton of ingredients left over, just keep adding more layers of bread, peanuts, raisins, syrup, and cheese.

Cover the baking pan with seran wrap or a plate or something, and place in fridge for at least 4 hours.

Cut out a piece of the capirotada like you would a cake or brownies, serve on a dish, and enjoy :)

jueves, 31 de octubre de 2013

Better "Instant" Ramen

Just because Ramen comes in packets doesn't mean it can't also be made delicious. Rather than use the seasoning packet (which has like tons of salt and animal goodies) in my "miso" ramen packets, I used actual miso and dried shiitake mushrooms for the broth. Cooking the noodles on low heat also lets the flavors seep in a bit better. Finally, some avocado to top, I know it sounds strange, but trust me it is delicious! This is just one idea as how to spruce up seemingly "plain" ramen, plus it's much faster than making the noodles from scratch ha ha.


Makes one or two servings

Ingredients:

Cooking oil, about 2 tablespoons
Garlic, 3 cloves, diced up finely
Onion, 1 small, sliced thinly
Chile peppers, deseeded, about 3
Cumin seeds, small sprinkle
Dried mushrooms (like shiitake), small handful
Miso paste, 1 to 2 teaspoons
Fueru wakame (dried seaweed), cut up into small bits, half a handful
Instant Ramen, 1 packet
Avocado, 1/2 (optional) to top
Black pepper, a sprinkle
Sesame seeds, a sprinkle

Place the oil, garlic, onion, chile peppers, and the cumin seeds in a medium pot. Turn the heat to medium and cook until the onions are soft but the garlic isn't browned. Add 1 cup of water.

With the heat still on add the dried mushrooms, the miso paste, and the wakame. Add enough water so it's enough to boil the noodles.

Once the mixture comes to a boil, add the instant ramen noodles. Allow the noodles to get soft, and then swish around with chopsticks or a spoon. Once the noodles are less crunchy, turn the heat down and cover the pot. Let this boil for about 5 minutes.

Pour all that goodness into a bowl, top with sliced avocado. Sprinkle pepper and sesame seeds to taste, and enjoy the wonderfulness!

sábado, 19 de octubre de 2013

Enchiladas rojas

Red enchiladas, what a wonderful delight. This is my basic recipe, everybody usually has their own, but this is one I now rely on constantly. Obviously, this might not be a recipe that's too good to try and make in Japan as the chiles are pretty much impossible to get... If you find this sauce is too spicy, just take out some of the chile de arbol and add more chile rojo. Also, use the same pot for all these steps without washing it out after each, to reserve every ounce of flavor. There's really no "right" way to make an enchilada sauce, so feel free to mix it up and get creative. Without further ado, some saucy spicy goodness:


Makes about 2.5 cups of sauce, enough to lightly sauce about 20 enchiladas, or 13~15 nicely sauced enchiladas.

Ingredients:

Onion, 1 medium, diced
Garlic, 4 cloves, chopped
Cooking oil
Dried herbs: Oregano, parsley, basil, cilantro; pinch of each
Black pepper, a few dashes

Dried chiles (all deseeded):


Chile rojo, about 7 medium, seeded (top of picture)
Chile de arbol, about 7 to 10, seeded; less if you don't want too spicy (bottom left of picture)
Chipotle (optional), 2 to 4, adds a subtle smoky flavor (bottom right of picture)

Flour, I use whole wheat but any is okay, about 1 tablespoon
Salt, a few dashes
Shredded cheese, preferably muenster, or any sort of white cheese
CORN tortillas, 10, 15, or 20 depending on sauce amount preference

In a medium pot, heat about 2 tablespoons oil over medium heat. Once hot, toss in half of the chopped onion (reserve the other half for the cheese later), the garlic, the dried herbs, and the black pepper. Fry on low heat until the onions and garlic become nice and toasty. Place this mixture in the blender, scraping everything out of the pot, but don't wash the pot.

Rinse the deseeded dried chiles to take off the tiny bits of dirt they usually have. You don't have to scrub too hard or anything, just be sure to rinse them off well. Be careful though, if you rinse or scrub too hard, the chiles will lose most of their flavor. Put the rinsed chiles in the same pot you fried the onion in.

Pour about 1/2 to 3/4 cup of water in the pot. The chiles shouldn't be fully covered in water, just enough water to cover the bottom of the pan well. Turn up the heat. Once the water boils, turn the heat down and let the chiles boil simmer for about 5 minutes. They are ready when the chiles are soft. Basically, when you take the lid off and your house starts to smell like chile and you cough, they are ready ha ha ha.

Add the now soft chiles into the blender with the onions and garlic. Pour the water from the pot in as well. Blend. If the mixture is too thick, add small amounts of water and keep blending until the mixture is relatively smooth, but not watery. Blend for about 1 minute, until there are no more chunks.

In the same pot, heat up about 2 tablespoons of oil. Once it's hot, sprinkle the flour across the oil. Let this fry for about a minute or two, it'll become bubbly, but be sure not to burn. You can stir if needed. This flour will help the sauce bond better.

Once the flour and oil are toasty, add the sauce from the blender and stir. Lower the heat, and continue to stir. Watch it like a hawk, because the sauce will splatter everywhere as it heats if you don't stir it constantly. If the sauce still seems way too thick, add a bit of water to the blender, blend to get the left over bits of sauce out, and pour this into the pot.

Quick note: The sauce I make tends to be way thicker than anything that comes from a can, so don't try to make this recipe the consistency of that watery sauce you get in those cans, it'll just taste all wrong... In other words, a thick sauce is okay.

Keep stirring the mixture and add the salt, a few dashes should do. Let the sauce boil and cook as you continue to stir constantly for about 1 to 2 minutes. Turn off and set aside.

Assembly line time! First, mix the rest of the chopped onion with the shredded cheese. Now it's time to stack and cheese these beauties. This process is easier with more people, but you can also do it alone if need be.

Heat up the tortillas, either on the open flame of your stove, or on a comal or non-stick pan. When the tortilla is still hot, grab the edge of it with two fingers and dip one side into the sauce until most of it is covered, then flip it to the other side to cover the other side in sauce. Place on plate, sprinkle cheese. Be careful with the heat, I suppose if it's too difficult to do this with your hands, you could use a fork (but I've found that becomes way messier than just using your hands).

Repeat this dipping, sprinkling, and stacking process until you have the amount of tortillas desired on a plate. On the last tortilla, pour a spoon of sauce over the top and spread around to cover any non covered bits of tortillas, then add the final sprinkle of cheese.

A side of guacamole, beans, and rice go wonderfully with this dish. You can also plop sour cream on them if they are too spicy to tone them down a bit while still keeping them delicious. Enjoy the hell out of these enchiladas!

martes, 8 de octubre de 2013

Cooking with Love

No recipe in this post, except maybe a recipe for inspiration. I read an article/post on the NY times website and felt particularly inspired to delve into why I love cooking so much. When I cook, as you know, I rarely use any measurements. My family and experiences have taught me that, for me, measuring spoons and cups make recipes quite constrictive and can hinder my creativity.

Cooking for me is more than simply throwing ingredients together to feed oneself. It's an artform, a creative expression that I take very seriously, and one that I use to meditate, connect and reaffirm my roots as well as explore the wide world that is out there.

I use cooking much like I use language. It expresses who I am, my hopes and dreams. Every recipe made is a constant reminder that nothing lasts, but it is the intensity of the moment and the memories surrounding it that make all the difference. I like to keep my ingredients simple and readily available to as many people as possible. I like for my cooking to tell stories, to engage the senses and create experiences we can't get any other way.

I'm no gold star chef or anything, and as I grow, so does my cooking. I am in a constant state of learning and improving. As I explore the world, I connect through cooking. I gravitate towards open air markets and food shops. I browse everything, ask how things are used, create entire conversations and interactions around food, and then add my own twists to the dishes I make. I love the hustle and bustle around ingredients that we all need to nourish ourselves, that we all need to survive.

The article made me realize that I especially love to cook for others. It's not about trying to impress people, if that were the case, I'd probably use more salt in my cooking ha ha. For me, it's about allowing people to taste a part of me, to experience food in a similar fashion as me, to bring us closer together using more than just words, and to build deeper spiritual connections.

I hope that when people eat my dishes, they tie memories to them. I hope that I can be something like that grandma in the article I read. I hope that people can taste not only the time, effort, and detail I put into my cooking, but also the immense amount of love and patience that are key ingredients as well. In one of my favorite movies called "Como agua para chocolate," someone asks the main character how she makes her mole. Her response is, you have to make it with lots of love. It really is that simple.

And so as my love for others grows, adapts, matures, accepts, tries new things, goes with the flow, and essentially lives life to the fullest, so does my cooking. Never forget to put love into all of your creations, it's an essential ingredient no recipe can function well without.

Here's the link to the short article I read:
http://www.nytimes.com/2013/10/02/dining/from-a-tortilla-the-feeling-of-a-warm-embrace.html?ref=dining&_r=1&

lunes, 7 de octubre de 2013

Pumpkin and Potato Cocunut Red Curry

I've always liked curry sauces and spices, and it's only been within the past year or so that I decided to make all my own curries and try my hand at these wonderful concoctions. I'm glad I did. This recipe is similar to the Green Curry I posted previously, but I made it differently in some key respects. Feel free to try my methods as well as others to develop your own special way of cooking, and to adjust for the flavors you like. One key difference in my cooking I think is the lack of super salty flavor. I've found that was the issue I had with most restaurant's otherwise amazing dishes. But since I make a ton of my own sauces and stuff now, overly salty flavors are not an issue for me anymore. Again, the lack of salt is my own personal preference, so if you like salt, I suggest you add a bit to any of the recipes you try on this blog ha ha. As always, use whatever veggies are in season and don't ever forget to visit your local Farmer's market. Nowadays, I rarely ever create recipes and cook with produce that is not in season. Fresh is key for me, and in season veggies taste loads different, not to mention the mass amounts of nutrients they contain. Also, you don't need the exact spices I've listed here except maybe the curry powder and garam masala, so feel free to use what you have readily available. Without further ado, hope you enjoy trying your hand at this smooth and tasty red curry.


Makes a medium sized pot's worth

Ingredients:

Step 1:

Fresh red peppers, cleaned and seeded, about a large handful's worth (less for less spicy)
Garlic, 5 cloves, chopped up liberally (will get blended anyway)
Ginger, chopped liberally, about 2 tablespoons worth
Red pepper powder(고춧가루), 1 to 2 teaspoons worth
Curry powder, 1 to 2 teaspoons worth (is a mix of ground coriander, turmeric, and cumin)
Garam masala, 1 teaspoon or less
Cumin seeds, 1/4 teaspoon
Whole anise seeds, 1/4 teaspoon
Cinnamon, a few sprinkles
Ground cloves, a few sprinkles
Dried herbs such as: oregano, cilantro, basil, parsley, a few sprinkles of each
Oil, for cooking (I prefer olive), 3 to 4 tablespoons

Further ingredients:

Coconut milk, 1 eight ounce can
Fresh green peppers, seeded and diced liberally, about a small handful
Onion, 2 small or 1 big, sliced into thin strips
1 medium to small pumpkin squash, skin cut off (or not), cut in cubes
Potatoes, unpeeled but washed thoroughly, 3 small or 2 medium, cut into cubes
Bay/Laurel leaves, 3 leaves

In the medium pot where the batch of curry will be made, place all the ingredients listed under step one, including the oil. Then turn on the heat to medium. Using a wooden spoon, mix the ingredients constantly as everything cooks making sure nothing sticks to the pan and that nothing burns. Cook like this for about 5 to 7 minutes or until everything is quite fragrant and the red chiles have a nice toast to them. Turn off the heat, cover the pot, and let sit for about 5 minutes.

Meanwhile, shake the can of coconut milk, rinse the top, and then pour the coconut milk into a blender. Add the contents of the pot and blend until everything is smooth and there are no more chunks of anything, about 20 seconds or so. Don't rinse the pot used to cook the red chiles.

In the same pot, place the green peppers and the sliced onion. Add about 2 to 3 tablespoons of cooking oil and fry for a bit over medium heat. Be sure to move everything around constantly so the leftover spices don't burn onto the pan, lower the heat if necessary. Keep cooking until the onions are braised or are no longer too hard.

Add the curry sauce from the blender to the pot and stir. Then add the cubed pumpkin squash, the potatoes, and the laurel/bay leaves. Stir everything. You may need to add a bit more water, use the now empty coconut can to do so to get all the extra bits of coconut milk you may have missed. Add enough liquid to cover the pumpkin and potatoes and stir.

Cook covered over medium heat until the mixture boils. Be watchful of it as it can boil over very quickly and leave you with a big mess if not careful. Simply uncover and stir a bit if it looks like it's about to boil over. Once boiling, turn the heat to the lowest setting and allow everything to cook slowly. You may also want to pop the lid just a tad bit to avoid any over-boil spill. The curry is ready when the potatoes and pumpkin are nice and soft, probably about 15 to 20 minutes of low boiling. Happy eats!

jueves, 3 de octubre de 2013

Baba Ghanoush

Eggplants have been everywhere. I was getting sick of dicing them up and putting them into only curries or stir fries. Then I remembered the ever so delicious baba ghanoush, and low and behold, I realized that all the ingredients I needed I could get here. The roasted walnuts added a nice crunch and flavor. I love this dish, and although it's a bit time consuming, if done right, you will not be disappointed. The eggplant is supposed to be blended, but I like the bigger chunks so I used a fork to smash what I could and then cut up the other large pieces with a knife. Also, if you cannot find a paper bag to sweat the eggplant in, you can just put them in a clean plastic bag instead. Ideally, the eggplant should be baked or roasted for long periods of time, but the paper bag trick was something I read on the grand internet and seems to have worked just as well. That said, this dish is the stuff of my dreams, so delicious!


Makes about 3 to 4 nice sized servings [or 1 serving if you are really hungry like I was]

Ingredients:

Eggplant, 3 medium, or 2 large, cut in half lengthwise
Oil for cooking, like olive oil
Garlic, about 4 or 5 cloves, diced up
Cumin seeds, a small pinch
Onion, 1/2 of a medium one, diced up
Walnuts, about 1/4 cup's worth, chopped up finely
Lemon, 1/2 or 1 small lime
ねりごま(練り胡麻) sesame paste, which you can usually find next to the sesame seeds at your grocery store, or tahini paste (which is basically the same thing), about 1 to 2 tablespoons worth

Spices and dried herbs to taste, such as:
Curry powder, I used 1/2 teaspoon
Black pepper
Oregano
Basil

Sesame seeds, for garnish, about 1/2 teaspoon

Using a knife, poke a few wholes on the purple skin of each eggplant slice.

In a large fry pan, heat up some olive oil. Add the eggplant skin side up and let it fry. Be careful not to burn it too much, or to allow the eggplant to stick to the pan. Cover the pan to let the eggplant steam itself while frying it.

Flip the eggplant over to the skin side and again be sure not to let it stick to the pan. You want the eggplant to cook enough to where the inside is super moist and rather mushy. Remove from the heat and place all the eggplant in a paper bag and close. Let sit for 20 minutes or so to let the skin become soft.

Meanwhile, heat some more oil in the pan. Add the cumin seeds and the garlic. Fry this over medium heat for a bit, right before the garlic begins to toast. Then add the onions and allow the garlic to becomes a bit brown and crispy, but not burnt.

Remove the garlic and onions and any excess oil from the pan and put aside.

In the same fry pan, add the walnuts and turn the heat up to medium. Use a wooden spoon to constantly move the walnuts around. The walnuts will go from seemingly fresh to burnt VERY quickly, so watch them carefully and move them constantly. When a nice toast begins to develop, lower the heat and let them roast a bit while continuing to move them around with a wooden spoon or spatula. Be sure not to burn them, you want them roasted and fragrant, not burnt.

After letting the eggplant sit in the bag for 20 minutes, use a spoon to scoop out the insides of each eggplant slice into a large bowl. Once all the insides are scooped out, use a fork to smash it all up. If the insides are not mushy enough to mash up with a fork, simply cut up all the inside scooped out stuff on a cutting board using a knife (that's what I did). Cut it into very small pieces.

Add the desired spices to the bowl with the eggplant and mix. Add the lemon juice and the sesame paste to the bowl and mix. Add the onion and garlic mixture you had set aside, mix. Finally, add the roasted walnuts and mix everything well.

Place the mixture in a serving dish and sprinkle sesame seeds on top. You can use the baba ghanoush to spread on stuff, with chips, or just eat it plain while still hot. It tastes great cold too, so it's something you can add to a bento if you'd like. Now you've found something delicious to make with all that eggplant currently in season. Happy nom nom!

Note: don't throw the eggplant skins away, eat them! They are delicious. What I did was in a tortilla (or I guess you could use naan or pita if available) I placed the skins, topped them with the baba ghanoush, the guacamole, the Pico de gallo, and some leftover beans I had to make a makeshift taco. In other words, you can restuff the skins with the baba ghanoush for some more wonderful eggplant flavor.

Pico de gallo

As mentioned before, nice little spicy peppers are in season here. They're being sold by the bagloads and so I'm finding many ways to make these delicious beauties part of my everyday meals. Pico de gallo is something I really enjoy and love to just slop on just about everything. It's a pretty simple salsa, and the flavors come from the freshness of the ingredients. Instead of the traditional jalapeños I'm used to using, I used the tiny little peppers I've been buying. They are quite a pain in the ass to cut and seed, but they are quite spicy and delicious, so well worth it in the end. If your hands are extremely sensitive to the chile burn, I suggest wearing gloves, or at least being very careful to touch the inside of the chiles as little as possible. I added some fried diced garlic I had left over as well, yum! I made mine in the jar I would be keeping it in for ease, but you could just as easily put everything in a bowl, mix, and then jar it.


Makes about 1/2 cup of salsa, so adjust portions accordingly for larger batches

Ingredients:

Tomato, 1 small
Onion, 1/2 of a large one, diced up.
Fried garlic, diced and fried in oil, about 1/2 tablespoon [optional]
Chile peppers, seeded and diced, about 3 tablespoons worth, more or less depending on your spice preference
Lemon, 1/2 or a small lime, squeeze the juice out into the jar
Black pepper, to taste, mine was about 1 teaspoon
Salt, very small dash (my preference)
Fresh cilantro if available [I didn't put in this batch because I cannot find, I don't like putting parsley in Pico de gallo, but I guess you could as a substitute)

Basically, add all the ingredients to a jar, cover, then shake it up until everything is integrated well and you have your salsa. What I did was add each ingredient to the jar as I finished chopping it up. When I was done, I added the lemon juice, the pepper, and a tiny amount of salt and shook. Easy, fast, delicious :)

Serve with tortilla chips (ha ha ha, as if I'd find that on this island), a more realistic idea is just with some sort of crispy potato chip. Or you could mix it into rice, etc. I get creative with my salsas because of the lack of tortilla chips here.

Note: a restaurant I used to frequent back in the U.S. would add diced strawberries or pineapple to their Pico de gallo. I've done it before, and trust me, it was delicious! So if you want to see if you like the taste, by all means, branch out and expand those taste buds!

Good Old Guacamole

Guacamole. Fantastic for just about everything. Most people have their own recipe, but the ingredients are basic. So feel free to adapt as you like. I usually make guacamole with fresh jalapeños, but since those are very hard to come by here, I use the fresh variety of peppers that are currently in season and I can get at my farmer's coop thingy. Because you know, I love fresh spicy food. I made a bit of a twist and added some diced garlic that I fried up as well.


Makes about 10 or so servings if used as dip

Ingredients:

Garlic, 4 or 5 cloves, diced into small pieces
Oil for cooking, about a tablespoon (I use olive)
Avocadoes, 3 medium and ripe
Spices and dried herbs, such as pepper, dash of salt, oregano, basil
Tomato, 1/2 of a large one, or 1 small tomato
Onion, 1/2 of a small one, diced
Fresh spicy peppers, seeded and diced up, to taste [optional I suppose]
Lemon or lime, 1/2 of a lemon or 1 lime
Fresh herbs, if you're lucky enough to find some in Japan... [not included in my batch, but so desired :( ]

In a fry pan, heat the oil a bit. Add the garlic and fry it up until the garlic becomes crispy and fragrant, but not burnt. Set aside.

In a large bowl, scoop out all the avocado. Use a knife to cut it up a bit inside the bowl. Using a fork (or a masher if you have one), mash up the avocado until it becomes a smooth mixture.

Add the pepper, salt, and any other spices and dried herbs you like.

Add the tomato, and mix everything well. Add the onion, mix well. Pour the garlic and the remaining small amount of oil from the pan into the mix as well. Add the peppers, mix, then squeeze the lemon and add the juice, mix. Add fresh herbs [if any], mix well.

Enjoy! You can put this stuff on sandwiches, eat it with rice, chips, snacks, etc.

sábado, 28 de septiembre de 2013

Sweet Potato, Tofu, and Onion Mole

Again, no recipe. However, my recipe was adapted from an online one (link at bottom). Sorry, but I'd say it's rather impossible to find the ingredients in Japan. Mole is quite a culturally significant dish for me. Nobody I know in my family has ever made it from scratch, we have always relied on the pre-made jar of sauce. So for me to make it in Japan (using ingredients I brought back with me that my grandma and extended family helped me acquire when I visited this past summer) is sort of a personal accomplishment for me. Food for me is one of those things that touches our cores, and so the dried smoked chiles, the block chocolate, and the almonds in this recipe are more than just ingredients, they're expressions of my individual culture. Making the mole is how I pay respect to my roots, many of which I still don't know much about, while simultaneously creating my own traditions and customs. Mole is an ancient food, very complex in flavors, chock full of vitamins, incredibly stunning in color and fragrance, and of course, excellent in taste. So here's a picture of the beautiful mole I made today:


Not to mention, it came out so much better than the jar we are used to. I can't wait to make a fresh batch for my family. Here's the link to the recipe I used as a sort of "guideline," because of course I adapted it to my tastes. I also substituted oil for the lard to make it veggie friendly (another reason I'd prefer to make my own):

http://allrecipes.com.mx/receta/775/mole-poblano.aspx

Hummus

No recipe per se. Just a picture. I'm still figuring out what sorts of spices and portions I want to use in my hummus, so it's a work in progress. I would search the web to get ideas and adapt the recipes to your likes. If you can't find garbanzo beans (chickpeas), you can actually use the red adzuki beans instead. And if you can't find tahini, ねりごま(練り胡麻)"nerigoma" is basically the same thing. You should be able to find it next to the sesame seeds at the grocery store. Also, I read (and it works) that if you whip the lemon juice and the oil in the blender first before adding the other ingredients, it makes the batch of hummus fluffier. My batch this time around:

Veggie Charro Beans

Beans, such an important asset to my diet. Charro beans are pretty traditional Mexican fare. Basically, you throw a whole bunch of stuff in a pot with the beans and cook it. They tend to have some sort of pork, but obviously, my version does not. I add some dry chipotle I brought back with me to add a very nice smoky and spicy flavor. You can toss in any seasonal vegetables as well. I've used okra, but you could also throw in some zucchini too, add this in when you add the chile peppers. Anyway, this recipe is fairly easy to make (just takes a long time to soak overnight and then cook), and you can use whatever beans you like really, not just the black beans I used. I'm sure you can even mix types of beans too (my next idea!). I usually make a huge batch and eat them throughout the week. Beans always make me light up inside ha ha. ALWAYS be sure to clean your beans. I usually dump out all the dry beans on my table and put them into a pot after I've inspected them in small batches removing any ones that are super grungy and of course any rocks or pebbles.


Makes one hell of a large pot of beans, so adjust portions accordingly. 8 hours overnight soaking plus 1 and a half or up to 3 hours cooking time.

Ingredients:

Beans; pinto, black, any type of bean should be alright, but keep in mind taste will differ. I use about 5 to 6 cups.
Clean, wash, and rinse the beans. Place the beans in a large pot, and add water to cover them with twice as much water as there are beans. The beans will soak up the water and the amount will about double. Leave them in a pot overnight or for at least 8 hours. Yes, this amount of time is essential. You will be very disappointed if you try to cook unsoaked beans.

Oil, for cooking
Mild to Spicy Chiles of any kind, cleaned and seeded, about 1 cups worth, less if they're really spicy
Onion, about 1/2 cup, diced
Garlic, 5 to 7 cloves, diced

Herbs and spices such as:

Black pepper, 2 teaspoons
Oregano, to taste
Cilantro, to taste
Cumin seeds, a small pinch
Whatever else you have in your cabinet really

Tomato, 1 to 2 medium sized, diced
Tomato paste, about 6 tablespoons (because the paste is sold in little packets here, ok...) or one small can if you can get it
Bay/Laurel leaves, about 4
Salt, to taste. I don't like salt much so I use only about 1 teaspoon for a batch this huge, but you can add more

Strain the overnight soaking water out from the beans. Place the beans in a different pot than the pot you'll use to cook them in.

In a very large pot where you will cook the beans, heat some oil on medium heat. Add the onion, and the garlic. Mix around with a wooden spoon. Once the onions and garlic are well toasted, add the spices, lower the heat, and let everything cook for about another 2 minutes or until everything smells nice but isn't burnt.

Add the chile peppers and cook everything for a bit. Then add the diced tomato and cook for about another minute, mixing constantly.

Add the beans, and use a glass to pour water into the pot. Put enough water to cover the beans well. You don't want watery bean soup, but you also don't want the beans to run out of water while cooking (because then they won't cook). Finding this amount may take practice, but is well worth the effort. If you put too little, be sure to add a bit more during cooking and make a mental note for next time. The beans should always be submerged by at least a small amount of boiling liquid.

Once the water is added, add the tomato paste, the Laurel/bay leaf, and the salt. Mix around to integrate the tomato paste. Cover the pot. Turn up the heat to medium. Once everything is boiling, turn the heat to the lowest setting and allow the beans to simmer for 1 and a half to 3 or more hours. Beans are ready when they are soft and not crunchy when you bite into them. Try not to uncover the pot too much during cooking either.

Note: How long it takes to cook will depend on your range. Back at my parent's house I cooked it on a super low flame for 4 hours, but the lowest setting on my stove here is still rather high for my likes, so my beans cook in about 1 and a half hours. The lower heat with longer time really allows all the flavors to get deep into the beans, so try not to make a "super quick" batch of beans. You will taste the difference ;)

Green Coconut Curry with Eggplant, Goya, and Tofu

This green curry was relatively simple to make, just took a bit of prep work. The key ingredients here are the fresh peppers, the coconut milk, and the garam masala. Peppers seem to be in season on the island right now, so I'm buying massive amounts of these green pepper like things that look like jalapeños, but are not very spicy. So I add some of the red peppers I get there too that have a bit more of a kick. You can honestly use whatever spices you have around and that you might like, I got creative. It came out delicious! If you have any fresh herbs like basil or mint, I would definitely throw that in their too. P.S., I now have a blender[YES!!], so many of my recipes may require one (as this one does).


Makes a medium size pot of green curry

Ingredients:

Lots of fresh peppers, more green than any color for a green curry, or whatever color you like really. Cut and seeded. About 2 to 3 cups worth
Shallots, peeled. Or about 1/2 cup diced onion
Garlic, I like garlicky flavors, so I used about 7 cloves (peeled of course)
Ginger, about 1 tablespoons worth, diced up coarsely

A Shitload of dried herbs and spices, to taste, such as:

Garam Masala, about 1/2 tablespoon (this is required)
Cumin seeds, a pinch
Anis seeds, a pinch
Dried basil, to taste
Pepper, to taste
Curry powder, to taste (the one I buy is usually just ground turmeric, coriander, and cumin)
Oregano, to taste
Cilantro, to taste
Cinnamon to taste

Cooking oil (I like olive oil, but any veggie oil is good)
Coconut milk, 2 eight ounce cans
Laurel/Bay leaves, about 3
Red chile powder, 1 teaspoon (optional)
Eggplant, 2 medium, cut in half and then into thick pieces
Goya (bitter melon), cut in half, seeded, then cut into thinnish pieces
Soft Tofu, 1 block, diced

Put the seeded peppers aside in a blender.

In a medium fry pan, heat about 3 tablespoons of oil a bit, then toss in the shallots(or onion), garlic, and ginger. Use a wooden spoon to make sure nothing burns and turn down the heat. Once the stuff in the pan has fried a bit and become lightly toasted, add the shitload of spices, fry a bit longer, and let everything become wonderfully fragrant, making sure not to burn anything to the pan.

Add the contents of the pan into the blender. Shake 1 can of the coconut milk (because it settles), rinse the top off, open, and pour the contents into the blender. Cover the blender and blend until everything is smooth and there are no more chunks of anything, about 1 or 2 minutes.

Pour the contents of the blender into a deep medium pot. Shake the other can of coconut milk, rinse the top, and pour it into the deep pot as well. Throw in a teaspoon of chile powder (optional). Mix well with a wooden spoon. Add the eggplant, goya, tofu, and bay leaves (and any chopped fresh herbs you may be lucky enough to have). Bring everything to a boil on medium heat, then turn down the heat. Simmer for about 10 to 15 minutes. The curry might be thick, so be sure to mix it every so often while simmering so nothing boils over and makes a mess. It's ready when it smells nice and the eggplant is no longer spongy but is now soft.

Note: You can taste the sauce once it starts to boil to see if you think it may need any other spices. Keep in mind that the boiling at low heat for a long time makes all the flavors pop out, so don't add too much spice just yet if the curry doesn't taste "spicy" enough quite yet. The heat and time will make stuff mesh better, trust me.

Enjoy!

viernes, 28 de junio de 2013

Imam Bayildi (Roasted stuffed eggplant)

Imam bayildi is a pretty stock Turkish dish and I felt like something different. Luckily, eggplant, tomatoes, and peppers are in season, so I thought why not make some nice roasted stuffed eggplant. The green peppers I used looked like jalapenos (they weren't), not the usual green peppers, but I suppose those would work just fine too. The roasted walnuts add a nice touch of smoky flavor.


Makes 4 slices of eggplant

Ingredients:

1 small to medium bag of walnuts
2 large eggplants, top stem part removed
Butter, just a tad (optional)
Olive oil, for cooking
Garlic, 2 large cloves
1/2 onion
Tomato, chopped up. About 2 big ones
Chili powder, or paprika, about 2 teaspoons
Small green peppers, seeded and diced up, about 8 to 10
Shiso leaves, sliced up into small bits. 1/4 cups' worth. Or you can use fresh parsley/cilantro, etc.
Pepper, to taste
Dried spices such a oregano and basil etc. To taste
Shredded cheese (optional) for topping

Chop up the walnuts into tiny pieces. Place in a large non-stick fry pan and roast them. Don't turn the heat up too high, and be sure to move them around constantly. Let them roast for about 5 minutes and become really fragrant. Be sure not to burn them. Set aside.

Pour some olive oil in the fry pan, heat, and fry garlic and onions until the onions are semi-translucent. Add the tomatoes and the chili powder or paprika and cook for about 5 to 7 minutes, mixing constantly and letting the mixture boil a bit. Add the walnuts, the peppers, and the shiso leaves (or parsley). Mix well, add pepper and dried herbs. Cook for about another 3 minutes. Pour mixture into a bowl and set aside, but don't wipe the pan.

Cut the eggplants in half lengthwise (for a total of 4 pieces). Place on same pan and roast on medium to low heat. Flip occasionally and be sure to roast both sides well. They are ready when the centers are less hard and spongy and more mushy. Remove and place on plate. Use a knife to slice the eggplant insides (not the purple skin) lengthwise.

Place a bit of butter in the eggplant center, and top with the tomato walnut mixture. Press the mixture down lightly with a fork into the eggplant. Wrap the eggplant slices in foil (usually 2 slices per foil packet) and place in your fish roaster/griller for about 5 minutes on medium heat. You don't necessarily have to put it in the grill, but this just helps the flavors mesh better.

Open the foil packets, carefully remove the roasted eggplant and place on a plate. Top with cheese (optional). Serve, you may need a knife to cut up the skin perhaps. Enjoy!

lunes, 24 de junio de 2013

된장찌개(Miso Soup)

Miso, known as 된장 in Korean, is such a great stock ingredient with so many uses. This type of soup differs from the Japanese version in that it uses garlic, and is spicy. I adapted this recipe from a Korean cookbook I bought recently. What better way to learn a language and culture than to buy a cookbook in that language and learn from it? Although I rarely follow recipes to the "t" I must give credit to this book for giving me some great ideas and more knowledge on many great Korean stock ingredients (many of which I can find here in Japan). Hope you enjoy this soup, and as always, feel free to use whatever vegetables are in season as well.


Makes about 4 large, 6 small servings
Ingredients:

出し昆布(dashi konbu), the seaweed used for soup stocks, a small strip
Also 出し昆布(dashi konbu) powder. About 1/2 tablespoon
唐辛子(とうがらし), dried red peppers, seeds removed and rinsed, about 7 to 10 small ones
고춧가루, red pepper powder, about 2 to 3 teaspoons
Garlic, 3 to 4 cloves, minced into little bits
味噌(みそ)Miso, 된장 in Korean, 1 large tablespoon's worth
Squash, diced up, 1/2 cup
Asparagus, diced up, about 6 to 7 stems
1 small onion, cut up into thin slices
Carrot, 1 medium, diced up
Tofu, diced up, 1/2 cup
ふえるわかめ, dried seaweed, about 1/4 cup or less, cut up into small bits (as the pieces will expand once wet and heated)
Sesame seeds, for garnish (optional)

In a medium pot, place the 出し昆布(dashi konbu), the 出し昆布(dashi konbu) powder, the 唐辛子(とうがらし) dried red peppers, the 고춧가루 (red pepper powder), and the garlic. Fill the pot about 1/2 way with water. Turn on the heat to medium, and bring to a boil.

This next technique I learned from my book: Dip a strainer into the hot water, and place the miso in the strainer. Press the miso through the strainer as it begins to dissolve until it is all in the soup. Using the strainer ensures you don't bite into a super salty chunk of undissolved miso as you drink your soup.

Add the squash, asparagus, onion, carrot, tofu, and the ふえるわかめ(dried seaweed). Bring to a boil. Lower heat and simmer for about 7 to 10 minutes or until the vegetables are no longer hard (note: the time is longer if you decide to use potatoes).

Serve hot. Sprinkle a few sesame seeds into the bowl (optional). Spicy miso soup, yum!

두부조림(Tubu Jorim) i.e. Tofu "stew"

The name says "stew" but it's more like 麻婆豆腐(Mabo Dofu) in flavor and texture, so it's more like Tofu in sauce. This dish came out really good. Can't wait to make more of this stuff!


Makes 2 servings
Ingredients:

The veggies and tofu:

A medium block of firm tofu, dices up into cubes
1 Eggplant, sliced thinly
1 bunch of えのき(enoki) mushrooms, they're the thin, long, white ones. Cut up into pieces
Oil for cooking, about 1/4 cup

For the sauce:

고추장, red pepper paste, called コチュジャン in Japanese, 1 tablespoon
고춧가루, red pepper powder, 1 tablespoon
Soy sauce, 2 tablespoons
みりん(Mirin)sweet fermented rice wine, 2 Tablespoons
Water, about 5 tablespoons

In a large fry pan (that's right, I have a frying pan now) heat up some oil over medium heat. When hot, carefully place the tofu cubes in the pan. If it starts to splatter, turn the heat down and cover. Be sure to move the pan around often so the tofu doesn't stick to the bottom. Try to fry all the sides of the tofu blocks, but it's okay if you don't. After they've all been fried lightly, leave the oil in the pan, and place the tofu in a plate with a paper towel to soak up some grease/moisture.

In the pan with the oil, add the ingredients for the sauce listed above. Cook over medium heat for a very short while, using a wooden spatula/spoon to mix the ingredients well. Add the eggplant and mushrooms and cook for a bit, about 3 minutes. Once this mixture starts to bubble, add the tofu. Bring the mixture back to a bubble, and immediately turn down the heat. Let all this bubble on low heat for about 7 to 10 minutes, to let the tofu soak up a ton of flavor. Mix it occasionally so nothing sticks.

When serving, scoop the tofu mixture out with a spoon. Use the remaining sauce in the pan to cook the Shiitake and bean sprouts in the previous recipe. If you like Mabo Dofu, you'll like this :)

びわ (Biwa) and Tomato Salad

It's びわ (Loquat in English??) season here. So I decided to make a salad using this wonderfully delicious fruit. The flavor is similar to an apricot, but a really ripe apricot with no sour flavor and perhaps less sweet. Quite delicious! Feel free to leave out any ingredients you can't find/don't like. My recipes are to give you ideas, not to follow crazily ha ha. The shiso, tomato, and biwa all in the same bite is really good. I had no idea those flavors would mix so well. Happy munching!


Makes 1 serving ;)
Ingredients:

A Tomato
1/4 to 1/2 of a cucumber
About 3 しそ(shiso) leaves, also in season right now. Adds a nice smell and flavor
びわ(biwa) fruit, 1 or 2, see picture for what a biwa looks like. Peeled, seeds removed, sliced
Olives, if you're lucky enough to find them
Mozzarella cheese, slices up in strips, again, if you can find it
Pepper, a few dashes
Dried parsley, a few sprinkles

Slice the tomato, lay out the slices on a plate. Sprinkle with pepper.

Cut the cucumber in strips, place ever so nicely next to the tomato.

Cut up the shiso leaves (after washing them of course) into thin strips. Place on top of the tomatoes. Place the sliced biwa fruit on top of the shiso. Place slices of mozzarella cheese in between the fruit. Sprinkle the dried parsley, and top with olives.

Alternatively, you can layer/mix the ingredients however you want. Maybe even add some walnuts if you have some. Or some raisins. Just some ideas.

Rice and Beans, topped with Shiitake and Bean Sprouts

An easy dish to make, and the final one of my dinner. Canned beans are pretty impossible to get on this island, that's what a trip to Busan is for :)


Serves quite a few or very few depending on how much rice you use. It's up to you. Ingredients:

For rice:

Rice
Canned beans

For "topping:"

About a bowl's worth of shiitake mushrooms, sliced in half
Bean sprouts, one medium bag
The left over juices/oil from the 두부조림(Tofu stew)

Rinse/wash the rice. Soak in water for a few hours or over-night if possible. Throw in some of the beans right before you set the cooker to start. I use a bit of the bean water from the can for the liquid to cook the rice. Push the button, let the magic happen.

For the "topping" simply sautee the mushrooms in the leftover sauce from the Tofu stew recipe. After cooking a bit, put in the bean sprouts and sautee a bit longer. Throw that on top of the rice when ready and yum! Easy

sábado, 18 de mayo de 2013

My Basic 김치 (Kimchi)

Yay to making my own 김치 (Kimchi)! This is a basic (and vegan!) recipe, and fairly easy to make. I know there's "11 steps," but most of these steps are really easy. I just made a step for each picture I took to keep it easy to understand. I like making my own kimchi because I can add the amount of spice I want, it contains no fish paste, and it doesn't taste like the ..uh hum... so called "kimchi" I find at the grocery store here. See the end for some variation ideas.

I make each batch about a week before I intend to use it. The flavor of kimchi can change with time, so it's all a matter of experimenting to find out how many days/weeks (perhaps months?) you want it to ferment in your fridge to find the flavor you like. I obviously like the way a week + tastes. Read this whole recipe before you intend to make any, and always use CLEAN utensils when making and picking out the kimchi from the bottle (no licking then picking etc.) as the kimchi can mold and your um... saliva will, I assume, change the flavor for the worse... I also use my sink as my kimchi making "work station," and I make sure to clean that before use too. Hope you enjoy:

Basic Kitchen utensils and stuff, all CLEAN:

Large bowl
Small bowl (I use small rice bowl)
Cutting board & knife
Large vegetable strainer
CLEAN, inside AND out, glass (or plastic) jar, approx. 300 ml size (I think that's the size)
Small rice paddle, or spoon of the same size. I use a rice paddle because it's easier to press the kimchi down (Step 8)
Small plate with edges (see step 7)
A few paper towels

Ingredients:

Half a medium sized bok choy cabbage, 白菜/はくさい in Japanese
Salt, a liberal amount, see step 3

Ingredients after soaking:

Hand minced fresh garlic, about 3 to 4 medium cloves worth
Hand minced fresh ginger, about 1/2 the amount you use for the garlic
1 small to medium onion (any kind), sliced up into thin strips
Soy sauce, maybe about 5 or so tablespoons. See step 4 for a visual (remember I myself don't measure)
Vinegar, 1/2 tablespoon (optional, but I like the tang it adds)
고춧가루, red pepper powder, 1,2,3,4 etc. heaping teaspoons worth, depending on your spice preference(I used 4 here). This is straight up 唐辛子/とうがらし powder with NO added extras. They sell the type specifically used for kimchi in Korea, but you might be hard pressed to find this in Japan. I can't stress enough that this be the pure red pepper powder, or else you might end up with sugar or other fun things added in (like fish powder, read your labels)that many Japanese seasonings contain. You just can't get around substituting for this ingredient, sorry...

Step 1.


Remove any visibly "not so great" parts of the cabbage, like little black spots (or sometimes bugs ha ha). Cut the core out of the cabbage as pictured above.

Step 2.


Now cut it in half as pictured above. Then cut up these two halves into mediumish pieces. Pick out any more visibly "not so great" pieces, like overly black spotted pieces. Some pieces of the cabbage will have tiny tiny black spots. A few are alright, but if too many, take them out. When all that is removed, wash the cabbage thoroughly. Place the washed and cleaned pieces in the strainer.

Step 3.


Place the cleaned and washed cabbage pieces into the large bowl. Fill with water, swish around with your (clean) hands, drain. Do this 2 or 3 times and drain the water. Then sprinkle with a fair amount of salt (I'm guessing like 4 or 5 tablespoons worth), fill bowl again halfway with water and mix around with your hand to swish all the cabbage in the salt water

Then fill up the bowl with more water to cover most of the cabbage. It's okay if a few chunks stick out. Cover with a large clean plate (or seran wrap) and let soak overnight, or less, see note below. When done soaking, drain water from bowl, fill with clean water, swish around then drain again. Do this one or 2 more times to remove excess salt.

One handful at a time, place the cabbage in the strainer and press down to let excess water drain out from the cabbage. Do this until all the cabbage is in the strainer. Rinse the large bowl, and wipe the inside dry with a clean paper towel.

Important Note: If making in the hot humid months, only let the cabbage soak for a few hours or less, maybe even only half an hour. Kimchi is traditionally a wintertime food, so if it's cold enough, you can leave the cabbage to soak overnight, otherwise, only let soak for a few hours or less. I.e. You don't want it sitting in warm water overnight.

Step 4.


Place the garlic, ginger, and onion in a small bowl. Pour enough soy sauce over to look like the picture above. I'm guessing it's 5 tablespoons or so. I placed a 1 cup measuring cup in the picture for perspective.

Step 5.


Place about half the cabbage from the strainer into the now dry bowl. Now the fun part!

Step 6.


Pour the contents of the onion bowl into the large bowl. Add the vinegar (optional), and sprinkle the chili powder over everything. Start mixing slowly with the rice paddle by folding the bottom contents of the bowl onto the top contents. Do this carefully so as to avoid spilling anything out of the bowl. Add the rest of the cabbage and continue folding to mix until everything is evenly distributed.

At this point, be careful not to touch or spill much stuff. It will start getting messy, so avoid spilling or touching other non-clean surfaces like counter tops or even the inside of the sink and such. If you do spill, you'll have to wash what fell out, but then that means you may have to wash the other utensils to get them clean again, your hands to get them clean again as well, etc. So just do this slowly and carefully so as not to spill much into the sink area.

Step 7.


Place the CLEAN (both inside AND out) and dry jar onto a clean edged plate as pictured above. Using the small rice paddle, scoop bits of the kimchi mixture into the jar while holding the jar over the mixture (in case it spills, it'll spill back into the bowl and you'll avoid losing kimchi to the sink monster).

Step 8.


Keep scooping until you get a nice layer, and begin to press the kimchi down with the rice paddle. Press firmly.

Step 9.


Keep scooping and pressing, and you'll notice that the kimchi will begin to let out some juice. Press down harder as you add more kimchi. It's alright if some of the juice spills over onto the jar or the plate. It is CLEAN after all remember.

Step 10.


Most of the kimchi should fit into the jar (any extra you can eat soon as your done). Keep filling and pressing the kimchi mixture until it reaches the top of the jar. See how the juice poured out onto the plate after pressing down firmly? Since everything is clean, place the jar in the large bowl and pour the extra juice from the plate into the jar to fill to the brim.

Using a clean paper towel, wipe the outside top part of the jar (where the lid gets screwed on to) clean. Then screw the jar lid on tightly, but not too tightly or it will be impossible to open later.

Step 11.


Scoop out any extra kimchi mixture from the large bowl into a small plate (see first pic above). Be sure to eat these leftovers the same day, preferably within an hour or two. Refrigerate until then.

Rinse off the extra kimchi juice from the now sealed jar and wipe it dry. Take some pictures to show your friends. Place the jar in the fridge and let the magic potion ferment. I like to let it ferment for a week, but a minimum of 3 days should be fine. Then you'll be ready to eat, hoping that you didn't screw the jar top on too tight making it difficult to open :)

Eating/serving: when picking the kimchi out from the bottle, ALWAYS use CLEAN utensils (no licking and double dipping). I use chopsticks to pick out the amount I want to use. When done picking out, be sure to press the kimchi down again so that everything in the jar is always covered by its own juice and that you seal the jar tightly again. If you don't do this, the top not-in-kimchi-juice bits might mold (which you can just carefully remove and salvage the rest), or it will change the flavor in not-so-good ways (edible, just strange...). Keeping everything submerged in the juice at all times will preserve it longer. You may even notice how the flavor changes day by day. But you probably want to consume this medium sized batch within a week or so of opening it. So always remember clean utensils, and cover everything in the juice at all times. Enjoy!

Variations: This is a basic recipe I came up with after looking at a few online recipes and making a few batches. You can use the same steps to make other types of vegetable kimchi as well, and even add things like radishes or scallions/chives. I also make a sliced cucumber and a sliced onion kimchi using smaller portions and smaller jars. I simply omit the overnight salt water soak and start at step 4.

With the cucumber kimchi, it's a bit harder to get the juices out from pressing firmly. So you may want to add a tad bit more soy sauce or even a very small amount of water to the mixture in the bowl.

With the onion kimchi, I simply use more sliced onion. If the onion is of good quality, the onion will become sweet after fermenting for a while. The spiciness from the red pepper powder mixed with the natural sweetness of the onion is fantastic!

Experiment with other vegetables and fermenting times, then begin practicing the wonderful art of kimchi making. Happy eating!